Resizing a virtual machine using OpenStack CLI on WEkEO
Introduction
When creating a new virtual machine under OpenStack, one of the options you choose is the flavor. A flavor is a predefined combination of CPU, memory and disk size and there usually is a number of such flavors for you to choose from.
After the instance is spawned, it is possible to change one flavor for another, and that process is called resizing. You might want to resize an already existing VM in order to:
increase (or decrease) the number of CPUs used,
use more RAM to prevent crashes or enable swapping,
add larger storage to avoid running out of disk space,
seamlessly transition from testing to production environment,
change application workload byt scaling the VM up or down.
In this article, we are going to resize VMs using CLI commands in OpenStack.
Prerequisites
No. 1 Account
You need a WEkEO hosting account with access to the Horizon interface: https://cf-admin.wekeo2.eu/login.
If you are a normal user of WEkEO hosting, you will have all prerogatives needed to resize the VM. Make sure that the VM you are about to resize belongs to a project you have access to.
How to create a VM using the OpenStack CLI client on WEkEO cloud
No. 2 Awareness of existing quotas and flavors limits
For general introduction to quotas and flavors, see Dashboard Overview – Project Quotas And Flavors Limits on WEkEO.
Also:
The VM you want to resize is in an active or shut down state.
A flavor with the desired resource configuration exists.
Adequate resources are available in your OpenStack environment to accommodate the resize.
Creating a new VM
To illustrate the commands in this article, let us create a new VM in order to start with a clean slate. (It goes without saying that you can practice with any of the already existing VMs in your account.)
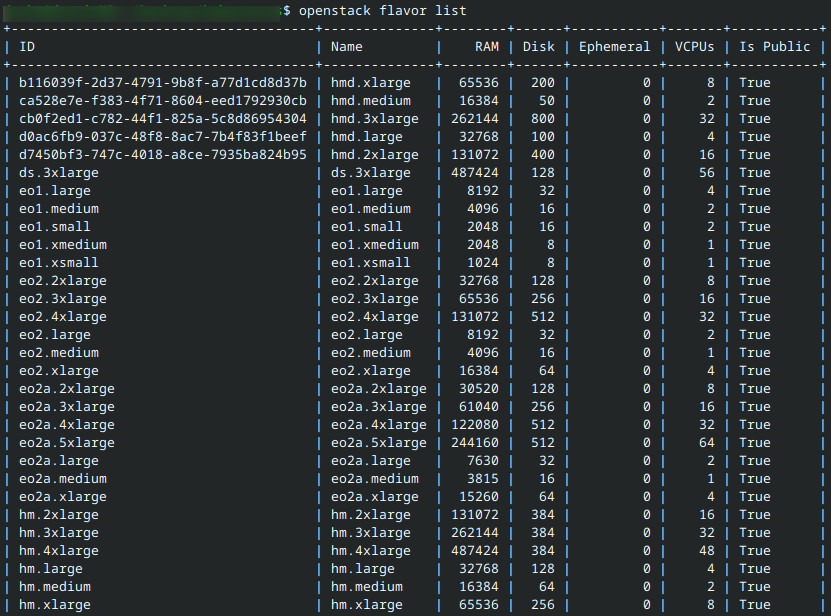
To see all flavors:
openstack flavor list

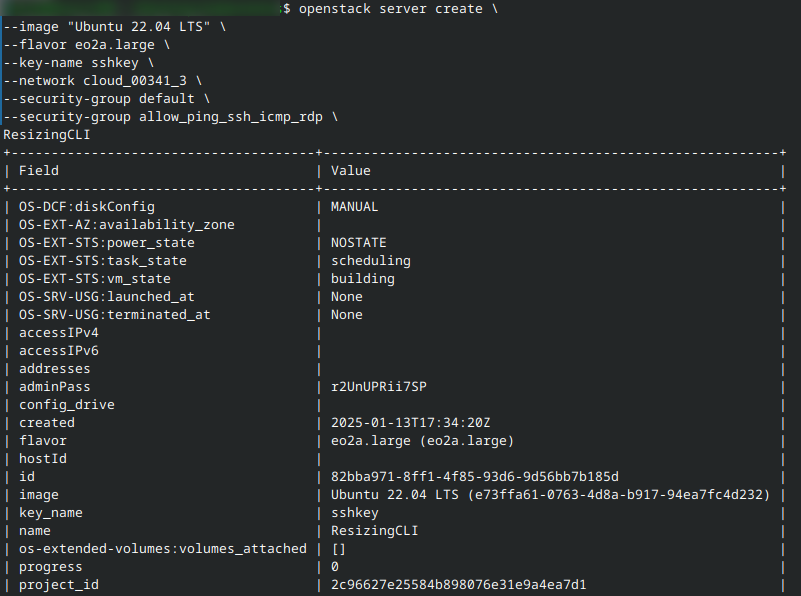
This is the command to create a new VM called ResizingCLI:
openstack server create \
--image "Ubuntu 22.04 LTS" \
--flavor eo2a.large \
--key-name sshkey \
--network cloud_00341_3 \
--security-group default \
--security-group allow_ping_ssh_icmp_rdp \
ResizingCLI
This is the result:

The id for ResizingCLI is 82bba971-8ff1-4f85-93d6-9d56bb7b185d and we can use it in various commands to denote this particular VM.
To see all currently available VMs, use command
openstack server list
Steps to Resize the VM
To resize a VM with CLI, there is a general command
openstack server resize --flavor <new_flavor> <vm_name_or_id>
We need flavor ID or name as well as VM’s name or id.
In this example we want to scale up the existing VM ResizingCLI, using eo2.xlarge flavor. The command will be:
openstack server resize --flavor eo2.xlarge ResizingCLI
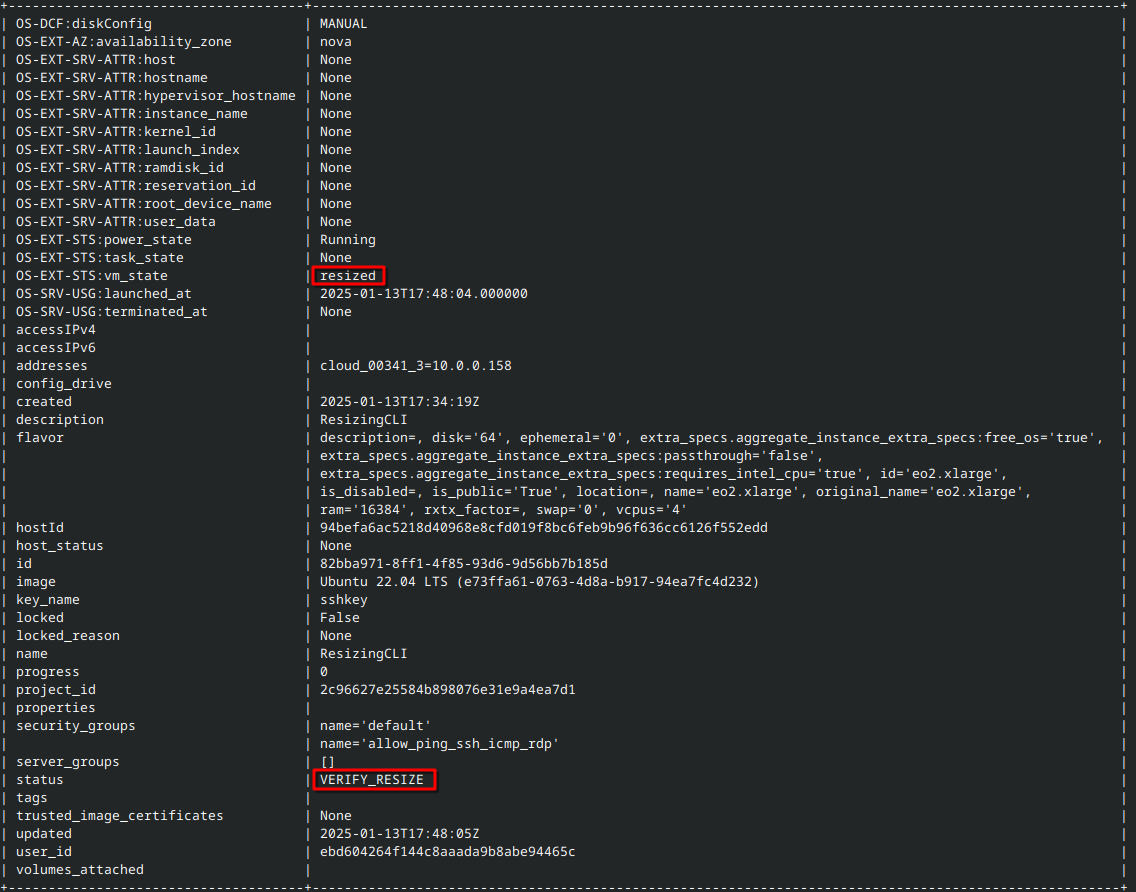
To verify the resize, check the status of the VM:
openstack server show ResizingCLI

When the VM has VERIFY_RESIZE status, we are able to confirm the resize. The command is:
openstack server resize confirm ResizingCLI
Execute once again:
openstack server show ResizingCLI
to see the real state of the VM after confirmation. We will now see that the status is ACTIVE.
Reverting a resize
Reverting a resize switches the VM back to its original flavor and cleans up temporary resources allocated during the resize operation.
It is only possible to revert a resize if the status is VERIFY_RESIZE. The command would be:
openstack server resize revert ResizingCLI
If status is not VERIFY_RESIZE, we will get message stating that it is not possible to revert resize while it is in an active state (HTTP 409). In that case, perform the “regular” resizing with openstack server resize.
What To Do Next
You can also resize the virtual machine using only OpenStack Horizon. More details here: Resizing a virtual machine using OpenStack Horizon on WEkEO